
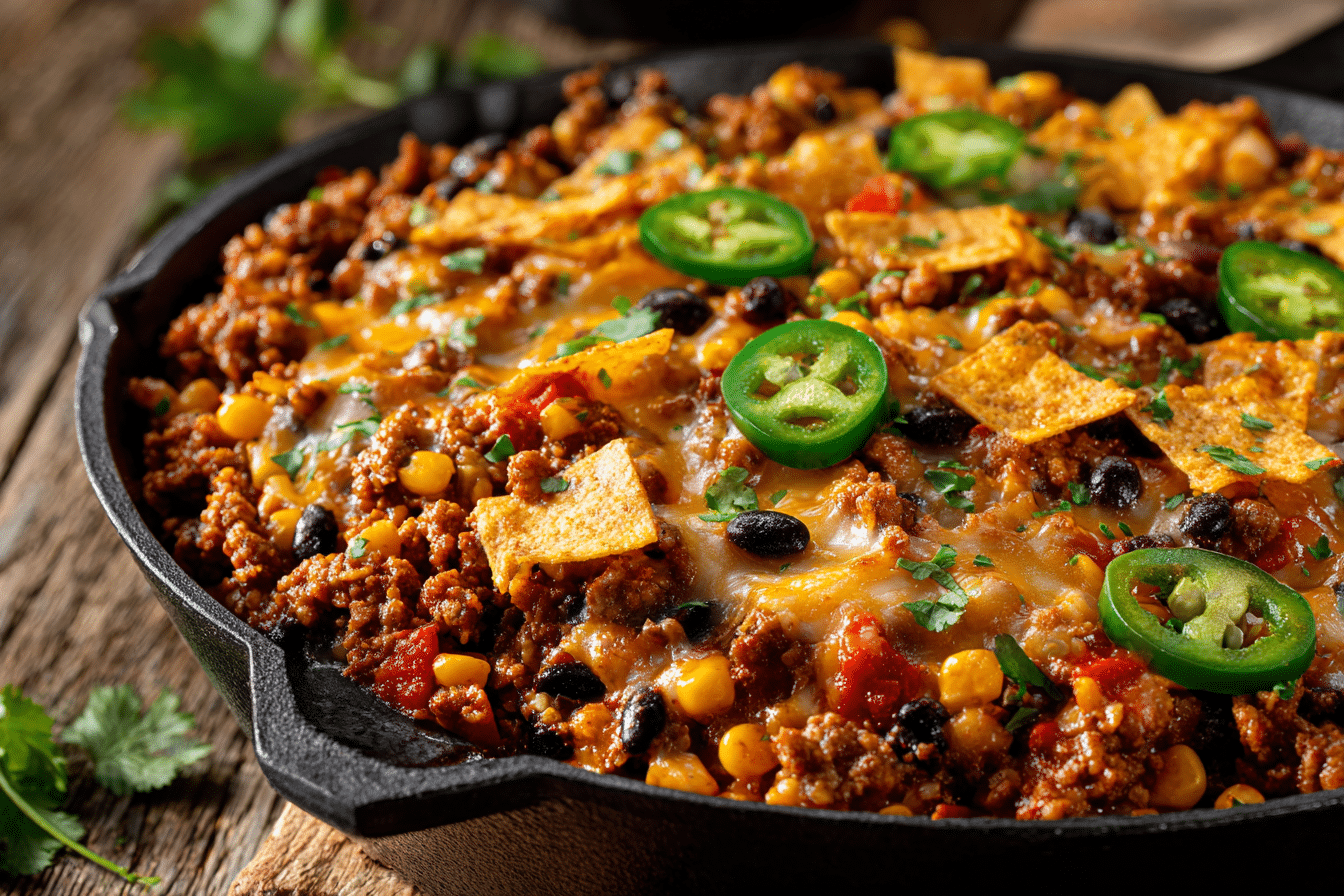
When you’re craving something hearty, cheesy, and full of bold flavor, this Loaded Queso Fiesta Beef Skillet Bake hits the mark. This Tex-Mex-inspired recipe layers seasoned beef, creamy queso, fluffy rice, and melted cheese, all topped with a golden crunch of tortilla chips. It’s a one-pan meal that brings the richness of comfort food with the convenience of simple preparation.
Perfect for a cozy night at home or a casual gathering, this dish balances textures and flavors in every bite. Whether served straight from the skillet or paired with sides, it offers a satisfying, no-fuss option that always earns repeat requests.
Ingredient Rundown

Ground Beef: This forms the base of the recipe, adding a savory, meaty flavor. For optimal results, use an 80/20 blend. If you want a lighter take, ground turkey or chicken can work just as well.
Queso Blanco: The velvety cheese sauce pulls all the ingredients together with a creamy consistency. A jarred queso dip adds convenience, but a homemade version with white cheese and mild chilies gives you full control over spice and texture.
Cheddar and Monterey Jack Cheese: Cheddar delivers a sharp edge while Monterey Jack brings a smooth melt. The combination creates rich flavor and stretchiness. Spice lovers can swap in pepper jack, or choose Colby for something more mellow.
Fire-Roasted Tomatoes with Green Chilies: These tomatoes add smokiness and gentle heat. They’re a great way to enhance the overall flavor without complicating the recipe. If needed, regular diced tomatoes can be substituted.
Cooked White Rice: Rice gives this dish structure and helps absorb all the cheesy goodness. Stick with long-grain white rice for a neutral base or switch to brown rice or cauliflower rice for different dietary needs.
Taco Seasoning: This pre-blended mix of spices adds that unmistakable Tex-Mex profile. Use a store-bought packet or combine your own chili powder, cumin, garlic powder, and paprika.
Crushed Tortilla Chips: The crunchy topping brings contrast to the creamy interior. Regular tortilla chips are perfect, or try flavored ones like ranch or lime for a twist.
Fresh Toppings: Brighten the final dish with chopped green onions and cilantro. These add freshness and color. If cilantro isn’t your favorite, parsley is a good alternative.
Optional Garnish: A spoonful of sour cream or Greek yogurt balances the heat and adds cool creaminess at serving time.
Cooking Instructions
-
Brown the Meat: In a large oven-safe skillet, cook the ground beef over medium heat until browned and fully cooked. This takes about 6 to 8 minutes. Drain off any extra grease.
-
Add Seasoning and Tomatoes: Stir in the taco seasoning and the full can of fire-roasted tomatoes with green chilies, including the liquid. Let the mixture simmer for a few minutes so the spices can blend into the beef.
-
Mix in Rice and Queso: Turn the heat down to low. Add the cooked rice and queso blanco. Stir until the mixture is evenly combined and smooth.
-
Melt in the Cheese: Sprinkle in half of the shredded cheddar and Monterey Jack cheese. Stir gently until it melts and the filling becomes creamy.
-
Top and Prep for Baking: Spread the mixture into an even layer. Sprinkle the remaining cheese over the top, followed by the crushed tortilla chips.
-
Bake: Transfer the skillet to a preheated 375°F oven. Bake uncovered for 15 to 18 minutes, or until the cheese is bubbling and the chips are golden and crispy.
-
Finish and Serve: Let the skillet rest for a few minutes. Garnish with green onions and cilantro. Add a dollop of sour cream or Greek yogurt if desired, and serve warm.
Cooking Tips & Adaptations
-
Watch the Bake Time: Don’t overbake—too much time in the oven can cause the cheese to separate or dry out the rice.
-
Spice to Taste: For more heat, add jalapeños or hot sauce. For less, use mild queso and skip the green chilies.
-
Make It Meatless: Swap out the beef for black beans, pinto beans, or a mix of roasted veggies like bell peppers and zucchini.
-
Low-Carb Version: Cauliflower rice is an excellent substitute for a lighter meal without losing texture.
-
Stretch the Dish: Add a can of beans or extra rice to increase servings—perfect if you’re feeding a crowd or want leftovers.
-
Use Up Leftovers: This is a great way to repurpose extra taco meat, cooked grains, or vegetables already in your fridge.
Serving Suggestions
Bring this skillet straight to the table—it’s perfect for sharing. Pair it with a fresh salad, roasted corn, or guacamole for a more complete meal. It also makes a great centerpiece for casual get-togethers or game nights.
For drinks, think crisp and refreshing: sparkling water with lime, Mexican beer, or a tangy margarita all complement the dish’s richness. Want dessert? Keep it simple with cinnamon-dusted tortilla crisps or fresh fruit with lime and chili.
This dish also holds up well as leftovers, making it a smart choice for meal prep or next-day lunches.
Health Notes
While this recipe is rich and filling, a few easy changes can make it more nutritious. Use lean ground meat, low-fat cheese, and Greek yogurt to lighten it up without losing flavor.
Switching to brown rice adds fiber, while cauliflower rice can help cut carbs. The tomatoes and chilies offer vitamins and antioxidants for a small nutritional boost.
Keep portions moderate—it’s a satisfying dish, so smaller servings are plenty. Pairing with fresh sides helps create balance.
If you’re cooking gluten-free, be sure to use gluten-free chips, queso, and taco seasoning, as some brands may contain hidden gluten.
FAQs
Can I make this ahead of time?
Absolutely. Assemble the skillet and store it covered in the fridge for up to a day. Add the chips just before baking so they don’t get soggy.
What kind of queso works best?
Jarred queso blanco is ideal for convenience. Look for one with a smooth texture and simple ingredients. You can also use homemade queso if preferred.
Can I freeze leftovers?
Yes. Let the bake cool completely, then portion it into containers and freeze for up to 2 months. Thaw in the fridge and reheat in the oven or microwave.
How spicy is this dish?
It has a mild to moderate heat, depending on the queso and seasoning you use. For a gentler flavor, use mild versions and skip additional chilies.
Can I use a baking dish instead of a skillet?
Definitely. Cook the filling on the stovetop, then transfer everything to a greased 9×13 baking dish before topping and baking.
Why does the cheese get oily?
Overbaking or using pre-shredded cheese (which contains anti-caking agents) can cause this. Shred cheese fresh for a smoother melt and stick to the recommended bake time.
What should I serve with this?
Light and fresh sides work best—think chopped salads, grilled veggies, or a tangy cucumber salsa. They balance out the dish’s richness without competing with its flavor.
A hearty, one-skillet Tex-Mex meal made with seasoned ground beef, queso, rice, melty cheese, and crunchy tortilla chips. Comfort food that’s easy and packed with flavor.
- Prep Time: 10 minutes
- Cook Time: 20 minutes
- Total Time: 30 minutes
- Yield: 4 servings 1x
Ingredients
1 lb ground beef
1 cup queso blanco dip
1 cup shredded cheddar cheese
1 cup shredded Monterey Jack cheese
1 (10 oz) can fire-roasted diced tomatoes with green chilies
2 cups cooked white rice
1 packet taco seasoning
1 cup crushed tortilla chips
2 green onions, chopped
2 tbsp chopped cilantro
Sour cream or Greek yogurt, for serving (optional)
Instructions
-
Preheat oven to 375°F.
-
In a large oven-safe skillet, cook beef until browned. Drain excess fat.
-
Stir in taco seasoning and tomatoes. Simmer 2–3 minutes.
-
Add rice and queso. Stir to combine and heat through.
-
Mix in half the shredded cheese.
-
Smooth the top and add remaining cheese and crushed chips.
-
Bake uncovered for 15–18 minutes, until bubbly and golden.
-
Top with green onions and cilantro. Serve with sour cream or yogurt if desired.