
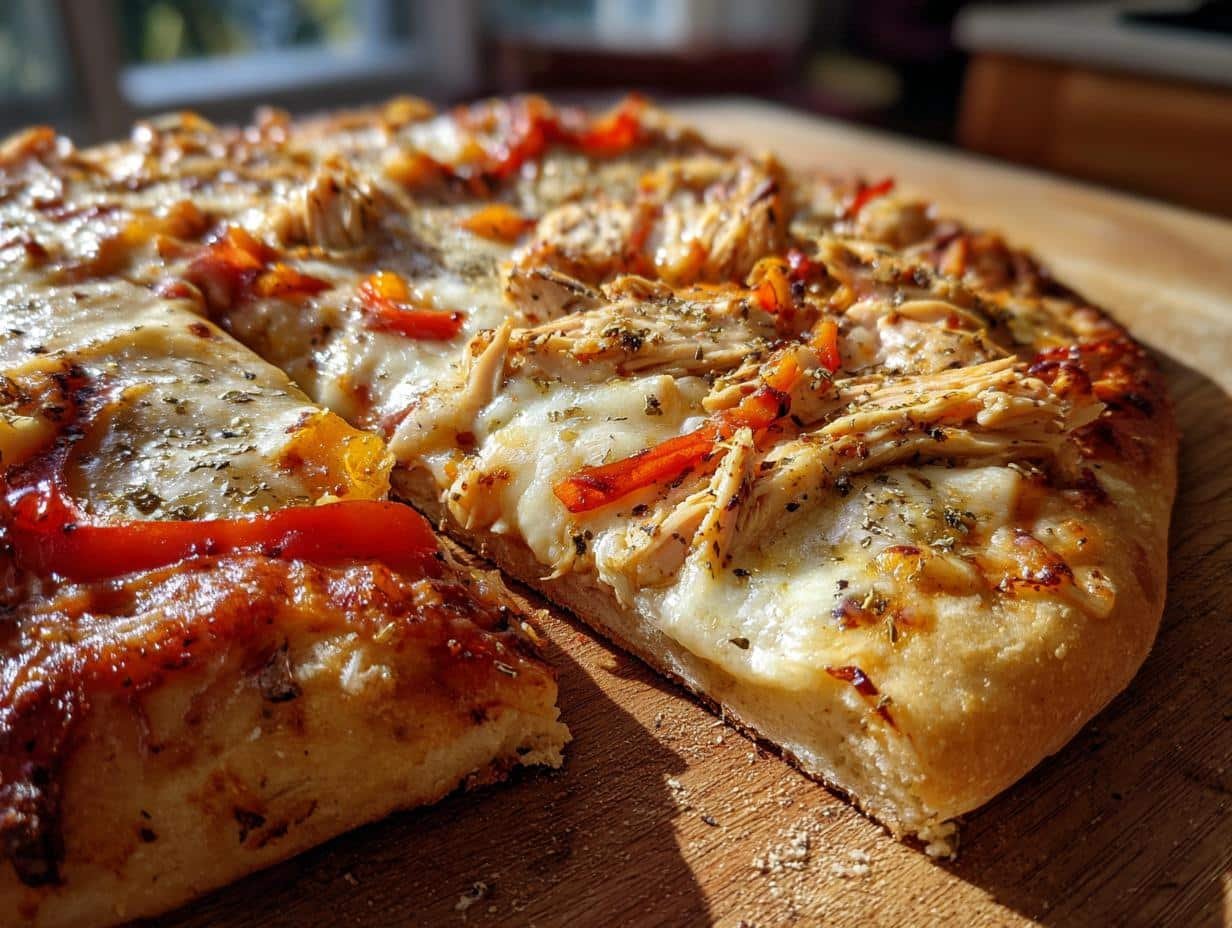
Let me tell you about my absolute favorite quick dinner – homemade chicken pizza! There’s nothing like that first bite of crispy crust piled high with juicy chicken and melty cheese. I’ve been making this version for years, tweaking it until it’s just right. What I love most (besides the deliciousness) is how simple it is – even on busy nights when I’m tempted to order takeout. Trust me, once you try making pizza at home with fresh toppings, you’ll never look at delivery the same way again. The best part? You probably have most ingredients already in your fridge!
Why You’ll Love This Chicken Pizza
This isn’t just any pizza – it’s the kind that makes you do a little happy dance when it comes out of the oven! Here’s why it’s become my go-to recipe:
- Weeknight lifesaver: Ready in 30 minutes flat – faster than delivery!
- Flavor bomb: That garlic-oregano combo with juicy chicken? Wow.
- Your rules: Swap toppings like a pro – I’ve used everything from BBQ sauce to pesto.
- Kid-approved: My picky eaters actually eat their veggies when they’re on pizza.
- Better than takeout: Fresh ingredients make all the difference – no mystery meat here!
Seriously, once you smell that golden crust baking, you’ll be hooked. It’s that good.
Ingredients for Chicken Pizza
Here’s what you’ll need to make my go-to chicken pizza – simple ingredients that pack huge flavor! I’ve learned through trial and error that quality matters here:
- 1 pizza dough (my homemade recipe takes 10 minutes, but store-bought works great in a pinch)
- 1 cup cooked chicken, shredded (I use leftover rotisserie chicken – so juicy!)
- 1/2 cup pizza sauce (or marinara if that’s what you’ve got)
- 1 1/2 cups shredded mozzarella (the fresh block kind melts better than pre-shredded)
- 1/4 cup each sliced bell peppers and onions (colorful veggies make it pretty!)
- 1 tsp dried oregano + 1/2 tsp garlic powder (my secret flavor boosters)
- 1 tbsp olive oil (for that perfect crispy crust)
See? Nothing fancy – just good, fresh stuff that comes together magically in the oven.
Equipment You’ll Need
Don’t worry – you don’t need fancy pizza-making tools for this! Here’s what I grab from my kitchen:
- Baking sheet (or pizza stone if you’re feeling fancy)
- Rolling pin (or clean wine bottle in a pinch – I’ve been there!)
- Pastry brush (for that olive oil shine)
- Pizza cutter (or sharp knife works too)
That’s it! No special equipment required – just basic kitchen stuff you probably already have.
How to Make Chicken Pizza
Okay, let’s get to the fun part – making that gorgeous chicken pizza! I’ve burned enough pizzas in my life to know exactly what works (and what doesn’t). Follow these steps, and you’ll have restaurant-quality pizza at home. Promise!
Step 1: Prep the Dough
First things first – heat your oven to 450°F (230°C). Hot oven = crispy crust! While it heats, let your dough rest at room temp for about 10 minutes. This little break makes it SO much easier to roll out without snapping back.
Flour your surface generously – I use about 1/4 cup spread out. Roll the dough to your preferred thickness (I like mine about 1/4-inch thick for that perfect crisp-chewy balance). Pro tip: If the edges crack, just pinch them together – no one will notice once it’s baked!
Brush the whole surface with olive oil – this creates that golden, slightly crisp bottom we all love. Don’t skip this step!
Step 2: Add Toppings
Now for the best part – topping time! Spread your sauce evenly, leaving about a 1/2-inch border for the crust. Here’s my golden rule: sauce first, then half the cheese, then toppings, then the rest of the cheese. This layering keeps everything melty and prevents toppings from burning.
Scatter that juicy chicken evenly – I like to tear it into small pieces with my fingers for better coverage. Then comes the colorful veggies! Bell peppers and onions add such nice crunch and sweetness. Finally, sprinkle the remaining cheese and dust with oregano and garlic powder. The smell alone will make your mouth water!
Step 3: Bake to Perfection
Slide your pizza onto the middle oven rack. Set your timer for 12 minutes, but start checking at 10 – every oven is different! You’re looking for three signs of doneness:
- The cheese should be bubbly with golden spots
- The crust edges turn a deep golden brown
- The bottom sounds hollow when tapped
If your cheese isn’t quite browned enough but the crust looks done, pop it under the broiler for 30-60 seconds – just watch it like a hawk!
Let the pizza rest for 2-3 minutes before slicing (I know, torture!). This helps the cheese set so it doesn’t slide right off. Then dig in while it’s piping hot – that first bite of crispy crust, melty cheese, and flavorful chicken is absolute heaven!
Tips for the Best Chicken Pizza
After making this chicken pizza more times than I can count, I’ve picked up some foolproof tricks for perfection every time:
- Pre-cook your chicken – raw chicken won’t cook through! I use leftover rotisserie or quickly sauté bite-sized pieces with garlic first.
- Pat chicken dry before adding – wet chicken makes soggy pizza (learned that the hard way!).
- For extra crisp crust, bake directly on the oven rack for the last 2 minutes.
- Too much sauce? Blot with a paper towel – better safe than soupy!
- Cheese sticking to cutter? Dip it in olive oil between slices.
My biggest tip? Have fun with it! Some of my best pizza creations came from happy accidents.
Chicken Pizza Variations
One of my favorite things about chicken pizza is how easily you can mix it up! Here are some delicious twists I’ve tried (and loved):
- BBQ chicken: Swap pizza sauce for barbecue sauce – sweet, tangy perfection!
- Spicy kick: Toss chicken with hot sauce or add jalapeños before baking.
- Veggie-loaded: Pile on mushrooms, spinach, or whatever’s in your fridge.
- White pizza: Skip red sauce – use garlic butter and ricotta instead.
- Breakfast pizza: Top with scrambled eggs and bacon – yes, really!
The possibilities are endless – that’s the beauty of homemade pizza!
Serving Suggestions
This chicken pizza shines all on its own, but here’s how I love to serve it for a complete meal:
- Crisp green salad – the fresh crunch balances the rich pizza perfectly
- Garlic knots – because you can never have too much dough! This cheesy garlic bread is a great alternative.
- Chilled white wine – a crisp Pinot Grigio cuts through the cheese beautifully
For kids? Add some carrot sticks and ranch for dipping – my little ones go crazy for this combo!
Storing and Reheating
Let’s be real – leftover pizza is practically a food group in my house! Here’s how I keep it tasting fresh:
- Fridge storage: Wrap slices in foil or store in airtight container for 3-4 days max.
- Freezing: Separate slices with parchment paper before freezing – they’ll keep for 2 months!
- Reheating magic: Skip the microwave! I use a hot skillet (medium heat) for 2-3 minutes per side – crust stays crispy!
- Oven method: 350°F for 8-10 minutes on a wire rack prevents soggy bottoms.
Pro tip: If the cheese looks dry after reheating, sprinkle a few drops of water before heating – works like a charm!
Chicken Pizza FAQ
I get asked about chicken pizza all the time – here are answers to the most common questions that pop up in my kitchen:
Can I use raw chicken on my pizza?
Absolutely not! Raw chicken won’t cook through properly in the short baking time. Always use pre-cooked chicken – my favorite shortcut is rotisserie chicken from the grocery store. It’s juicy, flavorful, and ready to go!
How can I make this gluten-free?
Easy peasy! Just swap regular dough for your favorite gluten-free pizza crust. I’ve had great results with cauliflower crusts too – they get nice and crispy. Same toppings, same deliciousness!
Why does my pizza get soggy?
Two likely culprits: too much sauce or wet toppings. Always pat your chicken dry before adding it, and go light on the sauce – you can always add more later. Baking on the lowest oven rack helps too!
Can I prepare this ahead of time?
You bet! I often prep toppings the night before and store them separately. Just assemble right before baking – the dough stays fresher that way. Leftovers reheat beautifully in a skillet!
Nutritional Information
Here’s the scoop on what’s in each delicious slice of this chicken pizza – keep in mind these are estimates that can change based on your exact ingredients and brands. My nutritionist friend helped me calculate this breakdown per slice (based on 8 slices per pizza):
- Calories: 280
- Protein: 16g (thanks to that chicken!)
- Carbs: 32g
- Fat: 10g
- Fiber: 2g
Remember – homemade means you control what goes in, so you can always tweak to fit your needs. More veggies? Less cheese? Your call!
PrintJuicy 30-Minute Chicken Pizza That Beats Takeout

A delicious homemade chicken pizza with a crispy crust and flavorful toppings.
- Prep Time: 15 minutes
- Cook Time: 15 minutes
- Total Time: 30 minutes
- Yield: 1 large pizza (8 slices) 1x
- Category: Main Dish
- Method: Baking
- Cuisine: Italian-American
- Diet: Low Lactose
Ingredients
- 1 pizza dough (store-bought or homemade)
- 1 cup cooked chicken, shredded
- 1/2 cup pizza sauce
- 1 1/2 cups shredded mozzarella cheese
- 1/4 cup sliced bell peppers
- 1/4 cup sliced onions
- 1 tsp dried oregano
- 1/2 tsp garlic powder
- 1 tbsp olive oil
Instructions
- Preheat your oven to 450°F (230°C).
- Roll out the pizza dough on a floured surface.
- Brush the dough with olive oil.
- Spread pizza sauce evenly over the dough.
- Sprinkle half the cheese over the sauce.
- Add shredded chicken, bell peppers, and onions.
- Top with remaining cheese and sprinkle oregano and garlic powder.
- Bake for 12-15 minutes until the crust is golden.
- Slice and serve hot.
Notes
- Use pre-cooked chicken for convenience.
- Adjust toppings based on preference.
- Let the dough rest for 10 minutes before rolling for better texture.
Nutrition
- Serving Size: 1 slice
- Calories: 280
- Sugar: 2g
- Sodium: 480mg
- Fat: 10g
- Saturated Fat: 4g
- Unsaturated Fat: 5g
- Trans Fat: 0g
- Carbohydrates: 32g
- Fiber: 2g
- Protein: 16g
- Cholesterol: 35mg