
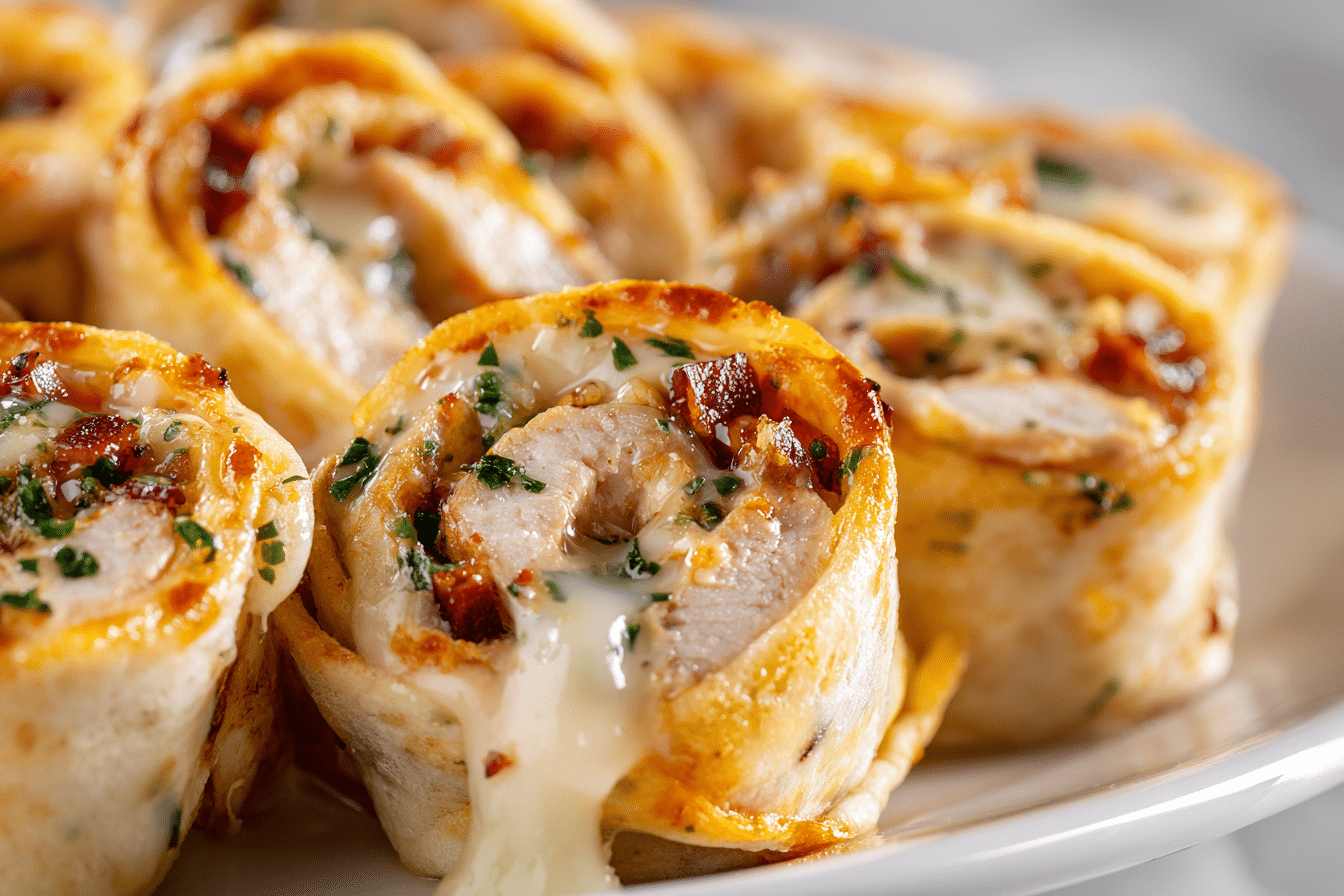
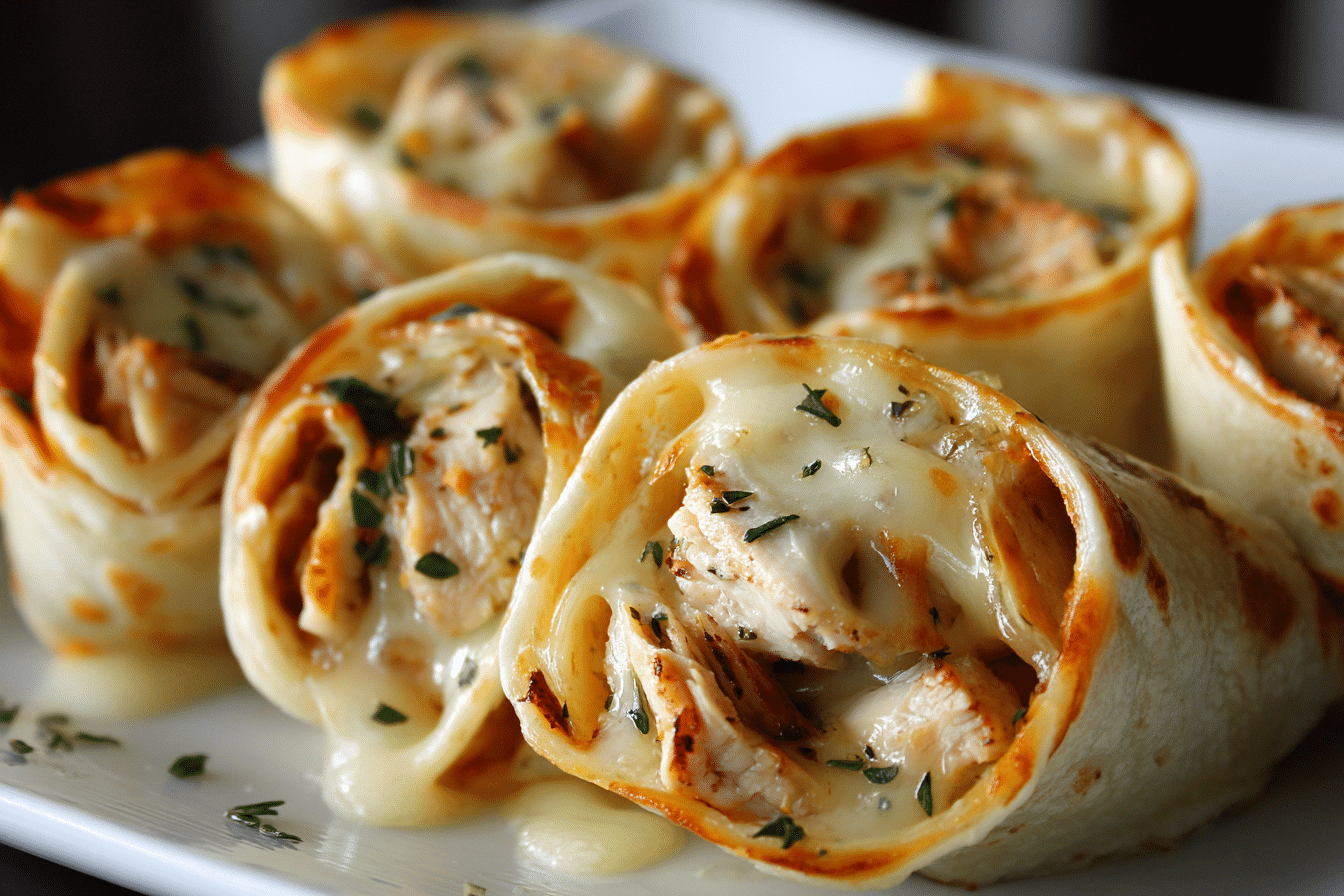
When you’re craving something warm, cheesy, and satisfying, these Golden Garlic Chicken Wraps are exactly what you need. They’re packed with flavorful garlic-seasoned chicken and loaded with melted cheese, all wrapped in a soft tortilla that’s toasted to crispy perfection.
This dish brings together familiar ingredients in a way that feels fresh and indulgent. Whether you’re feeding a hungry family or making a quick dinner for yourself, these wraps are simple to make but taste like a meal you’d get at your favorite cozy café. The combination of creamy filling and crunchy exterior makes every bite comforting and rich — without the need for complicated prep or fancy tools.
Ingredient Guide
Every element of this wrap has a purpose — from the protein-packed chicken to the gooey cheese blend. Let’s look at what goes into the recipe and how you can tailor it to suit your kitchen or diet.
Chicken
Start with fully cooked chicken breast, either shredded or chopped. It’s lean, neutral in flavor, and perfect for soaking up garlic and spices. Your options:
-
Grill or bake fresh chicken
-
Use leftover rotisserie chicken
-
Substitute boneless chicken thighs for a richer texture
Garlic
Garlic is the heart of this recipe. Lightly sautéed, it brings out a mellow yet deep flavor that permeates the filling. Stick to fresh garlic cloves if possible. For alternatives:
-
Use roasted garlic for a sweeter profile
-
Garlic powder can work in a pinch but won’t offer the same depth
Cheese Blend
This wrap wouldn’t be complete without cheese. A mix of mozzarella and cheddar gives both stretch and sharpness. You can get creative here:
-
Use Monterey Jack for a mild, creamy melt
-
Add a slice of provolone or Swiss for a twist
-
Try pepper jack if you like a spicy touch
Binding Ingredient
To hold everything together and keep the filling moist, you’ll need a small amount of cream cheese or mayonnaise. It adds smoothness and helps create that irresistible creamy texture.
-
Greek yogurt is a lighter option
-
Vegan mayo works for a dairy-free version
Tortillas
Soft, 10-inch flour tortillas are ideal for wrapping. They’re sturdy enough to hold the filling and crisp up nicely in the pan. You could also use:
-
Whole wheat tortillas
-
Gluten-free wraps
-
Low-carb varieties
Seasoning
Spices bring the flavors together. Here’s what you’ll need:
-
Paprika for color and mild smokiness
-
Onion powder for savory depth
-
Salt and freshly ground black pepper
-
Optional: red pepper flakes for heat
-
Fresh parsley or cilantro for a fresh finish
Instructions: How to Make Crispy Chicken Wraps
1. Cook the Chicken (if starting from raw)
If you’re cooking your own chicken, season it lightly and cook in a skillet or oven until done. Then shred or dice it into small pieces.
Want to save time? Grab pre-cooked or rotisserie chicken and skip this step.
2. Sauté the Garlic
In a small pan, melt a tablespoon of butter or drizzle in some olive oil. Add minced garlic and sauté over medium heat for about 30 seconds, just until fragrant. Be careful not to brown or burn it.
3. Mix the Filling
In a large mixing bowl, combine the following:
-
Cooked chicken
-
Sautéed garlic
-
Shredded mozzarella
-
Shredded cheddar
-
Cream cheese or mayo
-
Seasonings: paprika, onion powder, salt, and pepper
Stir everything together until evenly coated and creamy. The texture should be thick and scoopable.
4. Assemble the Wraps
Warm the tortillas slightly (a few seconds in the microwave or skillet works) to make them more flexible. Spoon the filling into the center of each tortilla. Fold in the sides, then roll it up tightly like a burrito.
Avoid overfilling — this makes the wrap harder to seal and cook evenly.
5. Pan-Fry to Crisp
Heat a skillet over medium heat with a bit of oil or butter. Place the wraps seam-side down and press gently with a spatula. Cook for 2–3 minutes per side until golden brown and crispy.
Work in batches if needed and keep them warm in a low oven until ready to serve.
6. Cool and Slice
Allow the wraps to rest for about a minute before slicing. This gives the cheese time to settle and keeps the filling intact when you cut into them.
Optional Add-Ins & Smart Swaps
-
Add Veggies: Toss in sautéed spinach, caramelized onions, or roasted red peppers for more texture and nutrients.
-
Heat Things Up: Stir in a little hot sauce or diced jalapeño for a kick.
-
Change the Protein: Turkey, pulled pork, or tofu are great substitutes.
-
Dairy-Free Option: Choose plant-based cheeses and vegan mayo.
-
Lighter Version: Use low-fat cheese, Greek yogurt, or smaller tortillas.
Global Variations to Try
-
Southwest-Inspired: Add black beans, corn, and taco spices.
-
Mediterranean Twist: Use feta cheese, olives, and oregano.
-
Buffalo Style: Mix in buffalo sauce and use blue cheese dressing or crumbles.
Perfect Pairings & Serving Suggestions
These wraps are incredibly versatile and can be served in countless ways:
-
Weeknight Dinner: Pair with a chopped salad or roasted vegetables.
-
Quick Lunch: Wrap them in foil and take them on the go.
-
Party Favorite: Slice into small sections and serve with dipping sauces.
-
Family-Friendly Meal: Let everyone customize their wrap before cooking.
They’re filling, flavorful, and perfect for any time you need something that hits the spot without being fussy.
Nutritional Benefits
Each wrap is a satisfying balance of protein, carbs, and fat, offering a hearty yet approachable meal. Chicken provides lean protein, while the cheese adds calcium and creaminess.
If you want a lighter option:
-
Use low-carb wraps
-
Choose reduced-fat or plant-based cheese
-
Replace mayo with Greek yogurt or leave it out entirely
Serve with fresh vegetables or a light soup to round out your plate.
FAQs
Q1: Can I prepare these wraps in advance?
Yes. You can assemble them ahead of time and refrigerate for up to 48 hours. Cook them fresh when ready to eat. You can also freeze them and reheat in a skillet or oven for a quick meal.
Q2: Which cheese works best for melting?
Mozzarella melts smoothly and gives that signature stretch, while cheddar adds flavor. Monterey Jack, provolone, or a cheese blend can also work beautifully.
Q3: How do I keep my wraps from falling apart?
Warm tortillas before rolling, and avoid overstuffing. Always cook seam-side down first to help seal them shut.
Q4: Is it possible to bake these instead of frying?
Yes. Brush lightly with oil and bake at 400°F for 12–15 minutes, flipping halfway through for even crisping.
Q5: Are these wraps good for picky eaters?
Definitely. You can keep the ingredients mild and customize each one. Slice into bite-sized pieces for easier eating.
Q6: What other proteins can I use?
Ground chicken or turkey, shredded beef, pulled pork, or plant-based meat alternatives all work well.
Q7: What sauces go well with these wraps?
Great dips include ranch, garlic mayo, chipotle sauce, or warm marinara. They pair perfectly with both creamy and tangy sauces.
Print
These garlic chicken wraps are stuffed with a creamy, cheesy filling and pan-fried until golden and crisp — the perfect combination of texture and flavor.
- Prep Time: 10 minutes
- Cook Time: 30 minutes
- Total Time: 40 minutes
- Yield: 4–6 servings 1x
Ingredients
-
2 cups cooked, shredded chicken
-
3 cloves garlic, minced
-
1 cup shredded mozzarella
-
1 cup shredded sharp cheddar
-
2 tablespoons cream cheese or mayo
-
1/2 teaspoon paprika
-
1/2 teaspoon onion powder
-
Salt and pepper to taste
-
4 large flour tortillas (10-inch)
-
Butter or oil for cooking
-
Fresh herbs (optional) for garnish
Instructions
-
Cook or shred chicken if not already prepared.
-
Sauté garlic in butter or oil for about 30 seconds until fragrant.
-
Combine chicken, cheeses, garlic, seasoning, and binder in a large bowl.
-
Warm tortillas and fill with about 1/2 cup of the mixture.
-
Roll tightly and cook in a skillet until browned and crispy on both sides.
-
Rest for a minute before slicing. Serve warm.