
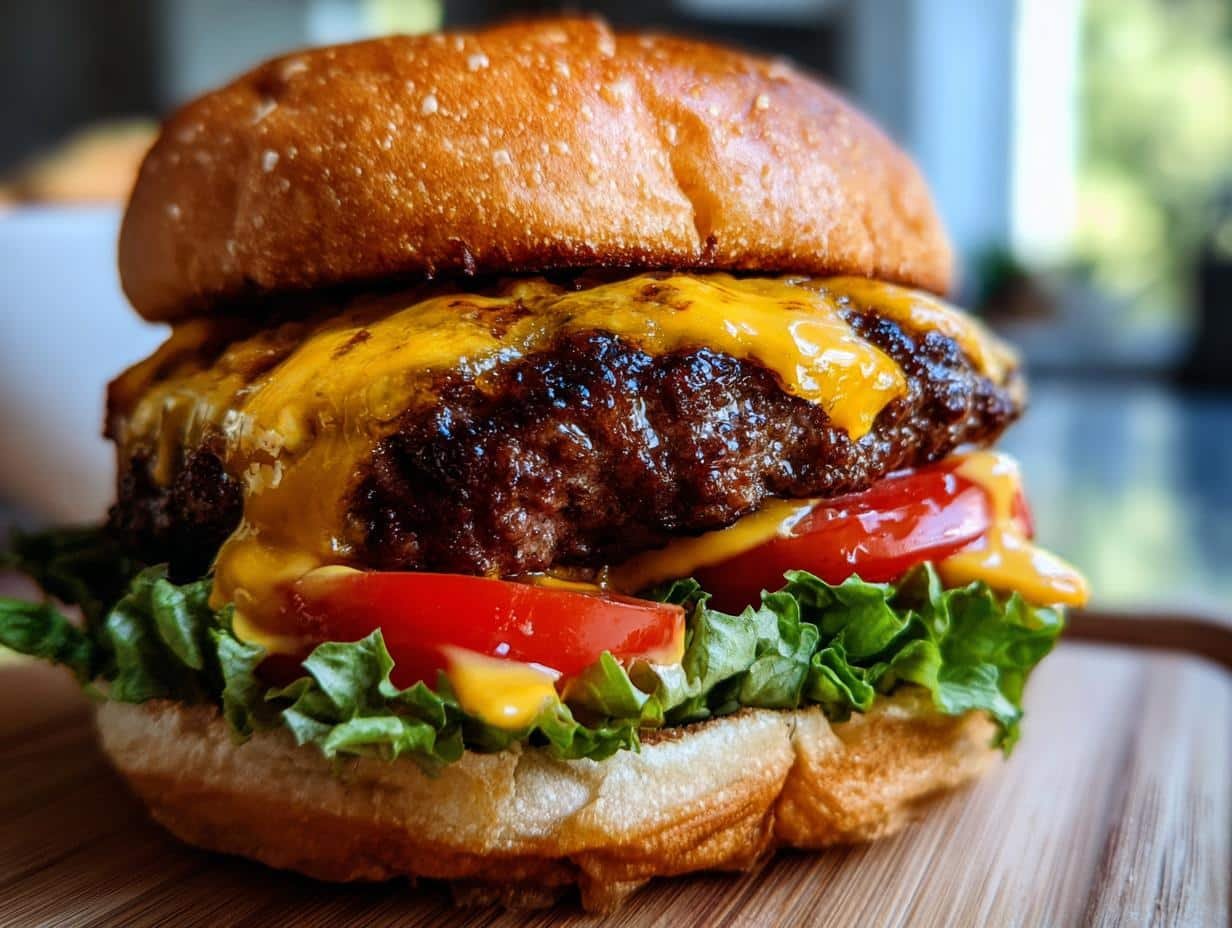
Nothing beats that moment when you take that first bite of a perfectly made cheeseburger – the juicy beef, the melty cheese, the crunch of fresh lettuce, all hugged by a soft bun. It’s pure happiness on a plate! I still remember my dad flipping burgers in our tiny backyard grill when I was a kid, the smell of sizzling beef filling the air. That’s when I fell in love with the magic of a simple cheeseburger done right.
This classic cheeseburger recipe is my go-to for quick weeknight dinners or weekend cookouts. It’s got everything you need – quality beef, the right seasonings, and those fresh toppings that make each bite better than the last. The secret? Keeping it simple and letting those good ingredients shine. Trust me, once you taste this, you’ll wonder why you ever settled for drive-thru burgers!
Why You’ll Love This Chees Burger
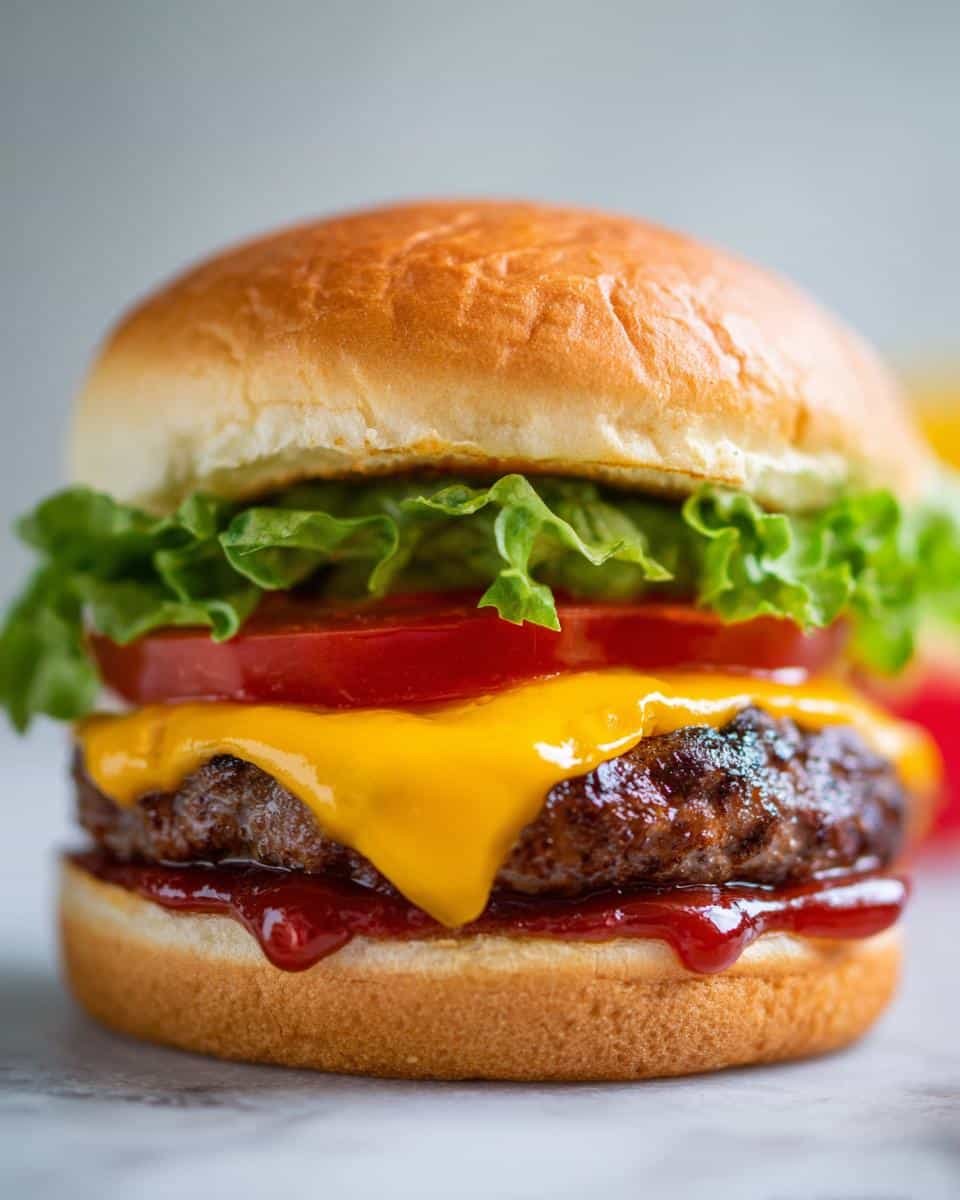
This isn’t just any cheeseburger—it’s the kind that makes you close your eyes and savor every bite. Here’s why it’ll become your new favorite:
- Juicy, flavorful beef: That perfect 150g patty, seasoned simply with salt and pepper, stays incredibly moist with a crispy-edged crust. No dry hockey pucks here!
- Melted-to-perfection cheese: The cheddar melts into gooey ribbons over the hot patty—none of that sad, unmelted slice nonsense. (Pro tip: Cover the pan for 30 seconds to get it extra melty.)
- Fresh, crunchy contrast: Crisp lettuce and ripe tomato slices balance the richness, while the lightly toasted bun holds everything together without falling apart.
- Customizable happiness: Love bacon? Add it. Prefer spicy? Swap in pepper jack cheese. This recipe is your burger canvas—paint it how you like!
It’s the kind of burger that makes you close your phone exists. Just you, that glorious stack of flavors, and maybe some napkins (it’s gonna get messy in the best way).
Ingredients for the Perfect Chees Burger
Here’s everything you’ll need to create burger magic. I’m giving you exact amounts because – trust me – getting these ratios right makes all the difference between “meh” and “WOW!”
- 1 beef patty (150g): That sweet spot between too skimpy and overly filling
- 1 hamburger bun: Soft but sturdy enough to handle juicy goodness
- 1 slice cheddar cheese: About the size of your patty – we’re aiming for full coverage
- 1 tbsp ketchup: The classic sweet-tangy backdrop
- 1 tbsp mustard: Yellow or Dijon, depending on your mood
- 2 lettuce leaves: Crisp iceberg or butter lettuce work best
- 2 tomato slices: About 1/4-inch thick – too thin and they disappear
- 1 tbsp mayonnaise: The secret glue holding everything together
- 1/4 tsp salt: Just enough to make the beef sing
- 1/4 tsp black pepper: Freshly ground if you’ve got it
Ingredient Notes & Substitutions
Burgers should work for YOU, so here’s how to tweak things without losing that perfect balance:
- Cheese swap: Not a cheddar fan? American cheese melts beautifully, or try pepper jack for some heat. Just avoid pre-sliced “burger cheese” – it never melts right!
- Bun alternatives: Gluten-free? Use a sturdy GF bun (toast it extra) or go bun-less with lettuce wraps. Brioche buns add richness if you’re feeling fancy.
- Meat matters: Ground chuck (80/20 fat ratio) is my gold standard, but sirloin works for leaner burgers. Just don’t go below 15% fat or you’ll lose juiciness.
- Sauce flexibility: Mix mayo with sriracha for spicy, or add pickle juice to your ketchup for tang. My weird-but-awesome trick? A thin swipe of peanut butter under the top bun.
- Veggie variations: No tomatoes in season? Try quick-pickled onions instead. Swap lettuce for arugula if you like peppery greens.
Remember – the best burger is the one YOU want to eat. These are just starting points for your masterpiece!
How to Make a Chees Burger Step by Step
Okay, let’s get cooking! Follow these steps closely—it’s the difference between a good burger and a “holy cow, did I make this?!” burger. I’ve made every mistake so you don’t have to!
- Season like you mean it: Pat your beef patty dry (this helps with browning!), then sprinkle both sides evenly with salt and pepper. Don’t be shy—this is your flavor foundation!
- Heat it right: Get your pan or grill screaming hot before the patty touches it. You should hear that glorious sizzle immediately. No oil needed—the beef fat will do its thing.
- First flip magic: Cook undisturbed for exactly 4 minutes. Resist poking! That crust is forming. When you see juices pooling on top, it’s time to flip.
- Cheese time: Flip that beautiful patty, slap the cheddar on immediately, then cover with a lid or foil for 30 seconds. This melts the cheese into liquid gold.
- Toast those buns: While the cheese melts, quickly toast the bun cut-side down in the pan or grill—just 30 seconds to get golden without turning cardboard-y.
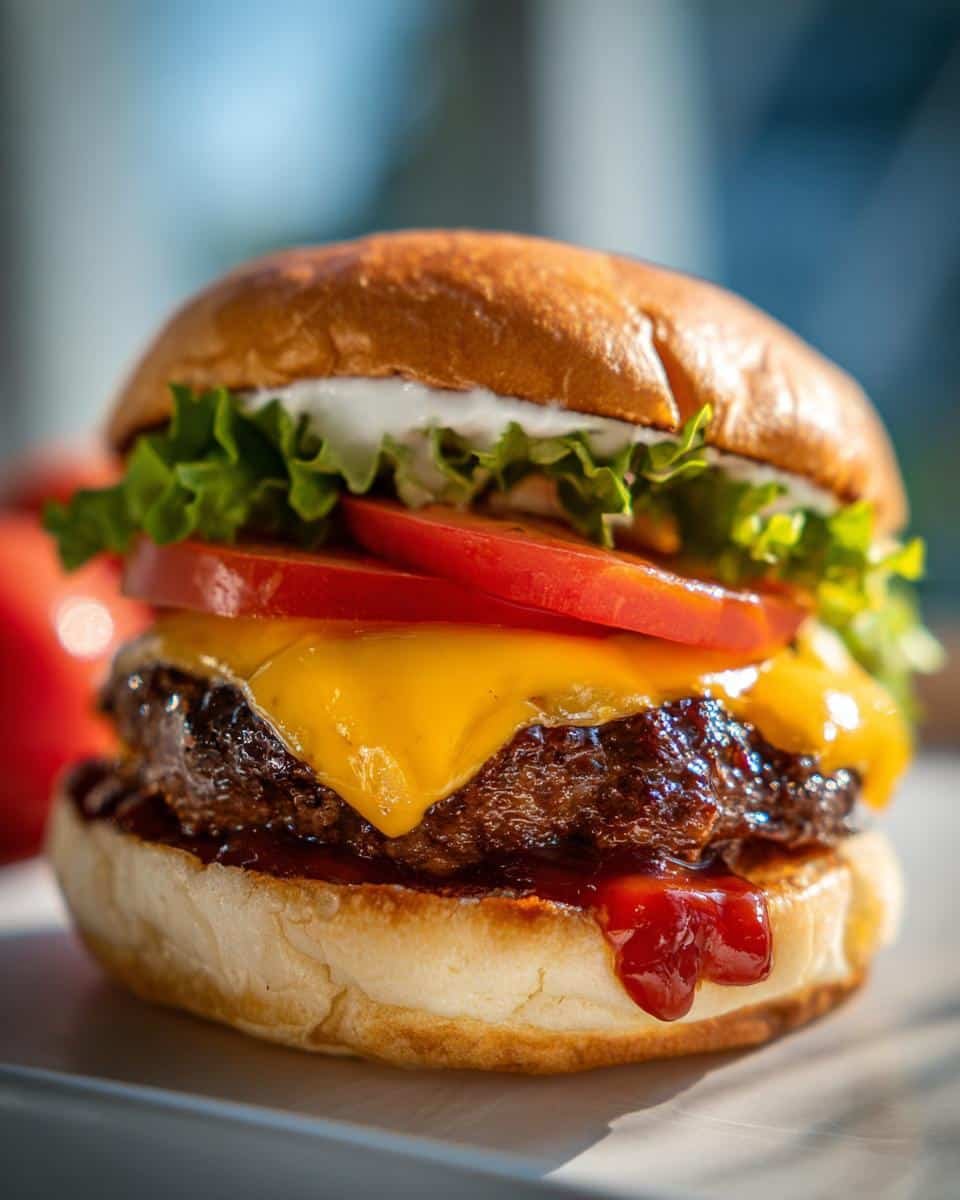
- Sauce strategy: Spread mayo on the bottom bun (it creates a moisture barrier against sog). Layer lettuce then tomato—this order keeps the tomato from making the bun wet.
- The grand assembly: Place that juicy cheesy patty on the veggies, add ketchup and mustard on top (so they don’t slide off), then crown it with the top bun.
- Patience test: Let it sit for 1 minute before biting—this lets juices redistribute so they don’t gush out on first bite (though that’s a delicious problem to have!).
Cooking Tips for the Best Chees Burger
After burning, squishing, and undercooking more burgers than I’d like to admit, here’s what actually works:
- Thumbprint trick: Press a slight dimple into the raw patty’s center. This prevents burger puff-up so you get even thickness when cooked.
- Don’t overcrowd: Cook one burger at a time if your pan’s small. Multiple patties lower the pan temp, causing steaming instead of searing.
- Cheese melt hack: If your cheese isn’t melting after covering, add 1/2 tsp water to the pan and cover again—the steam works wonders.
- Bun insurance: If toasting directly in the pan worries you, toast under the broiler for 1 minute instead. Watch closely—they burn fast!
- Resting matters: That 1-minute wait after assembly isn’t optional—it lets hot cheese glue everything together so toppings don’t go flying.
- Finger test: Not sure if it’s done? Press lightly—it should feel firm but spring back slightly. Or use a thermometer: 160°F for well-done (but 150°F for medium is juicier!).
My biggest lesson? Burgers forgive mistakes—even if it’s slightly overdone or messy, it’ll still taste amazing. That’s the beauty of cheeseburgers!
Serving Suggestions for Your Chees Burger
A perfect cheeseburger deserves the perfect companions! Here’s how I love to round out the meal—these pairings turn a simple burger into a full-on feast:
- Classic French fries: Crispy, salty, and absolutely mandatory in my book. Toss them with a little garlic powder or smoked paprika if you’re feeling fancy.
- Creamy coleslaw: That cool crunch cuts through the burger’s richness perfectly. My quick version? Shredded cabbage, mayo, apple cider vinegar, and a pinch of sugar.
- Pickle spears: Not just a garnish—their bright acidity resets your palate between bites. Bonus points for homemade refrigerator pickles!
- Onion rings: When you want that extra crunch factor. The beer-battered kind are my weakness – they’re basically edible napkins for all that burger juice.
- Simple green salad: Just greens, cherry tomatoes, and a tangy vinaigrette. It makes me feel slightly better about devouring that cheesy masterpiece.
On hot summer nights, I’ll sometimes skip the sides entirely and go straight for a frosty milkshake—vanilla or chocolate, depending on my mood. Something about that sweet, cold sip alongside the warm, savory burger just feels right. If you’re looking for a great side dish idea, check out this cheesy ranch potato recipe!
Pro tip: Keep those burger juices from dripping everywhere by serving with a stack of napkins under the plate too. Learned that one the hard way after ruining one too many shirts!
Storing and Reheating Your Chees Burger
Okay, let’s be real – the BEST cheeseburger is one fresh off the grill. But life happens, and sometimes you’ve got leftovers (though in my house, that’s rare!). Here’s how to keep that burger magic alive for round two without ending up with a sad, soggy mess:
Storing Your Leftover Burger
The golden rule? Disassemble before storing! I learned this the hard way after too many mushy-bun tragedies. Here’s what works:
- Patty preservation: Let the cooked patty cool completely, then wrap tightly in foil or store in an airtight container. It’ll keep in the fridge for 2 days max—any longer and the quality drops fast.
- Bun business: Store buns separately at room temp in their original bag or a bread box. Never refrigerate – that’s the fast track to staleness!
- Topping tactics: Keep lettuce and tomato in separate containers with a paper towel to absorb moisture. Condiments can stay in their original bottles.
My emergency move? If I MUST store an assembled burger (like for next-day lunch), I wrap it in parchment paper first, then foil—the parchment helps wick away some moisture. Still not perfect, but better than nothing!
Reheating Like a Pro
Here’s how to bring that burger back to life without turning it into a hockey puck:
- Patty revival: Reheat gently in a skillet over medium-low heat for 2-3 minutes per side. Cover it for the last minute to melt any cheese. Microwaving murders the texture—don’t do it!
- Bun refresh: Lightly toast or warm in a 300°F oven for 3-5 minutes. This restores that slight crispness while keeping it soft inside.
- Cold toppings rule: Add fresh lettuce and tomato AFTER reheating the patty. They’ll provide that essential cool crunch contrast.
My weird-but-effective trick? If the patty seems dry after reheating, dab a tiny bit of beef broth or water on it before the final warm-up—just enough to create steam and rehydrate slightly.
What NOT to Do
From personal experience (so many mistakes!), avoid these burger storage blunders:
- Freezing assembled burgers: The texture turns all wrong upon thawing. If you must freeze, do just the patties (well-wrapped) for up to a month.
- Microwaving the whole burger: You’ll get a steamed bun and rubbery patty—the saddest combo. It’s worth the extra few minutes to reheat properly.
- Storing with condiments applied: Sauces make everything soggy. Always add fresh when rebuilding your burger.
Truth time? A cheeseburger is really at its prime within 30 minutes of making it. But if you follow these steps, day-old burger can still hit the spot—just maybe not quite as magically as that first glorious bite!
Chees Burger Variations to Try
Once you’ve mastered the classic cheeseburger, it’s time to play! Here are my favorite ways to mix things up—each one keeps that juicy, cheesy goodness while adding exciting new flavors. The best part? Most just require one extra ingredient!
Bacon Lover’s Dream
Because everything’s better with bacon, right? Here’s how to do it right:
- Add 2 crispy cooked bacon strips under the cheese so they get slightly melty
- Swap regular mayo for smoky chipotle mayo (just mix 1 tbsp mayo with 1/4 tsp chipotle powder)
- Bonus move: Save some bacon grease to brush on the bun before toasting—next-level flavor!
Spicy Southwest Kick
When you want some heat with your meat:
- Use pepper jack cheese instead of cheddar
- Add 2-3 pickled jalapeño slices (the bright green ones!) under the tomato
- Mix 1/4 tsp chili powder into your beef before forming the patty
- Top with a dollop of cool avocado crema (mashed avocado + sour cream) to balance the heat
Breakfast Burger Bonanza
Who says burgers are just for lunch? This morning twist is my weekend favorite:
- Top the cooked patty with a fried egg (sunny-side up so the yolk becomes instant sauce)
- Swap cheddar for melty American cheese—it’s classic diner style
- Add 1 crispy hash brown patty or tater tots right on the burger—trust me on this!
- Skip ketchup and use maple syrup for dipping instead (sounds weird, tastes amazing)

Mushroom Swiss Upgrade
For when you want something a little fancier:
- Sauté 1/4 cup sliced mushrooms in butter until golden, then pile them on the patty
- Use Swiss cheese instead of cheddar—its nutty flavor pairs perfectly with mushrooms
- Add a smear of Dijon mustard instead of yellow for extra sophistication
- Top with arugula instead of lettuce for peppery bite
Hawaiian Vacation Burger
Sweet, savory, and totally tropical:
- Add 1 grilled pineapple ring (fresh or canned) right on top of the patty
- Brush the bun with teriyaki sauce instead of mayo before toasting
- Use provolone cheese—it melts beautifully and complements the pineapple
- Optional: Add 1 slice of Canadian bacon for full Hawaiian pizza vibes
The beauty of burgers? You can mix and match these ideas too—bacon AND jalapeños? Yes please! Just remember: no matter what you add, keep that beef patty juicy and that bun toasted. That’s what makes a cheeseburger truly magical. If you are interested in other breakfast ideas, check out this guide on building a balanced breakfast.
Nutritional Information for Chees Burger
Okay, let’s be real—when you’re biting into a juicy cheeseburger, nutrition labels probably aren’t top of mind. But for those curious (or trying to balance indulgences), here’s the breakdown for one classic cheeseburger. Just remember: these are estimates based on my exact ingredient list—your mileage may vary depending on brands and tweaks!
- Calories: 550 (Hey, happiness counts as calories well-spent!)
- Protein: 30g (That beef patty’s doing heavy lifting)
- Fat: 30g (12g saturated—blame the cheese and mayo, but they’re so worth it)
- Carbs: 40g (Mostly from that soft bun—swap for lettuce wrap if you’re cutting back)
- Sugar: 8g (Blame the ketchup and bun’s slight sweetness)
- Sodium: 900mg (Burgers are salty by nature—drink extra water!)
- Fiber: 2g (Those veggie toppings help a tiny bit)
Important Note: These numbers can swing wildly depending on your choices! Using turkey instead of beef? That drops fat but also some flavor. Low-sodium cheese? Cuts salt but might not melt as nicely. Gluten-free bun? Often higher in carbs. My philosophy? Enjoy the real deal occasionally rather than a “diet” version that leaves you unsatisfied.
Pro tip: If you’re watching portions but craving that burger fix, try making “slider” versions with 75g patties on dinner rolls—all the flavor, just smaller packages. (Though I usually end up eating two…oops.)
Common Questions About Chees Burgers
After years of burger experiments (and many, many taste tests), I’ve answered every cheeseburger question imaginable—usually the hard way! Here are the ones people ask me most:
“Can I freeze the beef patties?”
Absolutely! I always make extras for lazy-day meals. Here’s how: Shape your patties, then layer them between parchment paper in an airtight container. Freeze for up to 3 months. Thaw overnight in the fridge before cooking—never at room temp (hello, bacteria!). Pro tip: Season AFTER thawing so salt doesn’t draw out moisture during freezing.
“What’s the best cheese for melting?”
My top three melty heroes: American (yes, the processed kind—it’s a melt champion), cheddar (sharp or mild, your call), and pepper jack (if you like a little kick). Avoid pre-sliced “burger cheese”—it’s got weird additives that prevent proper melting. Surprise winner? Fontina cheese—it gets gloriously gooey!
“How do I keep my burger from shrinking?”
Ah, the great patty shrink! Two tricks: 1) Use 80/20 ground beef—that 20% fat keeps things juicy but does mean some shrinkage. 2) Press a thumbprint into the center of your raw patty. As the meat cooks and tightens, that dimple prevents the dreaded burger balloon that then deflates into a thick puck.
“Why does my bun always get soggy?”
Been there! The enemy is steam and condensation. Fixes: 1) Toast your bun—it creates a moisture barrier. 2) Put mayo or butter on the bottom bun first—fat repels water. 3) Layer lettuce between patty and tomato—it’s like a crunchy raincoat for your bread. 4) Assemble right before eating (no pre-made burgers sitting around!).
“Can I make these ahead for a party?”
For sure—with a smart strategy! Cook patties to just underdone (they’ll finish heating later), then keep warm in a 200°F oven. Toast buns but don’t assemble. Set up a “burger bar” with toppings so guests build their own—that keeps everything fresh and crispy. For big crowds, I use a slow cooker to keep patties warm (with a little beef broth to prevent drying).
Rate This Chees Burger Recipe
Alright, burger lovers – now it’s your turn! Did this recipe give you that perfect, juicy bite? Make your cheese melt like a dream? I want to hear all about it (the good, the bad, and the messy!). Drop a rating below and tell me:
- What worked like magic? (That thumbprint trick? The steam-melt for the cheese? Spill the secrets that made your burger shine!)
- What did you tweak? (Added bacon? Swapped cheeses? Your customizations might inspire someone else!)
- Any kitchen disasters? (Burnt buns? Cheese fail? We’ve all been there – share so others can avoid the same fate!)

Your feedback helps me (and fellow burger enthusiasts) make the next cheeseburger even better. And hey – if you snapped a photo of your masterpiece, I’d love to see it! Nothing makes me happier than seeing melted cheese dribbles and those perfect grill marks. For more great recipes, check out this smashburger quesadilla idea!
Whether you’re a first-time burger flipper or a seasoned grill master, your experience matters. So rate away – and may your burgers always be juicy!
PrintJuicy 150g Chees Burger Recipe That Melts Hearts

A classic cheeseburger with juicy beef patty, melted cheese, and fresh toppings.
- Prep Time: 5 minutes
- Cook Time: 8 minutes
- Total Time: 13 minutes
- Yield: 1 cheeseburger 1x
- Category: Main Course
- Method: Grilling
- Cuisine: American
- Diet: Low Lactose
Ingredients
- 1 beef patty (150g)
- 1 hamburger bun
- 1 slice of cheddar cheese
- 1 tbsp ketchup
- 1 tbsp mustard
- 2 lettuce leaves
- 2 tomato slices
- 1 tbsp mayonnaise
- 1/4 tsp salt
- 1/4 tsp black pepper
Instructions
- Season the beef patty with salt and pepper.
- Cook the patty on a grill or pan for 4 minutes per side.
- Add the cheese slice on top of the patty and let it melt.
- Toast the hamburger bun lightly.
- Spread mayonnaise on the bottom bun.
- Layer lettuce and tomato slices.
- Place the cooked patty with melted cheese on top.
- Add ketchup and mustard.
- Cover with the top bun and serve.
Notes
- Use fresh ingredients for best taste.
- Adjust cooking time for preferred doneness.
- Customize toppings as desired.
Nutrition
- Serving Size: 1 cheeseburger
- Calories: 550
- Sugar: 8g
- Sodium: 900mg
- Fat: 30g
- Saturated Fat: 12g
- Unsaturated Fat: 15g
- Trans Fat: 1g
- Carbohydrates: 40g
- Fiber: 2g
- Protein: 30g
- Cholesterol: 90mg